The till
The parts of the selling screen and what each one does.
- Who can do this
- Cashier Waiter Manager Owner
- Permission needed
- «Open Ticket»
The till (Point of Sale) is where a cashier spends the whole day. These are its parts:
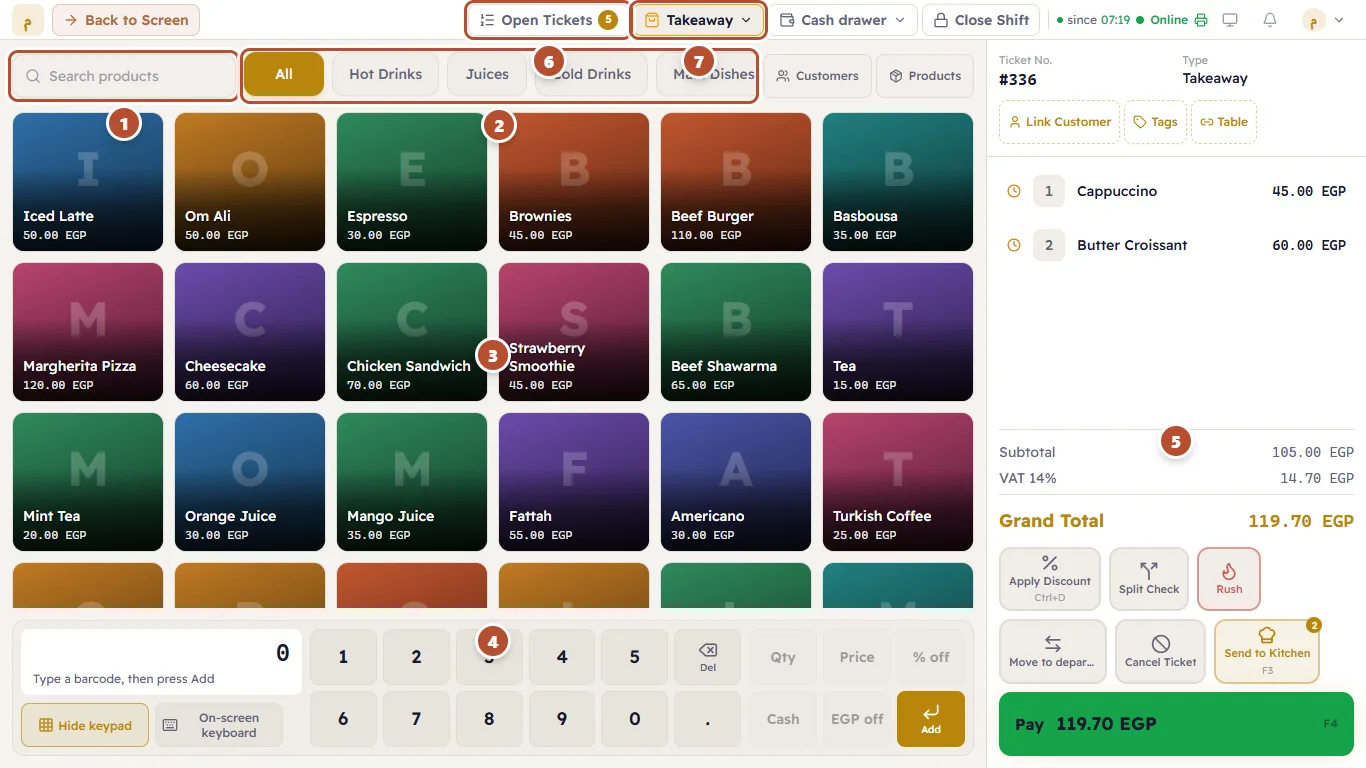
- Search — type part of an item's name and the matching items appear (see Adding items).
- Categories — All shows every item; any other category shows its items only. Next to them, Customers and Products take you straight there.
- Items — each item is a button with its name and price. One tap adds it to the ticket.
- Keypad — for quantities, barcodes, discounts and cash (see The keypad).
- The ticket — its number and type, the items added, subtotal, tax and total, then the ticket buttons and Pay.
- Open Tickets — tickets not closed yet; the number on it is how many (see Open tickets).
- Department — such as Takeaway, Dine-In or Delivery. It decides how the sale works (see Departments).
The ticket
As soon as you add the first item, Major opens a new ticket by itself and gives it a number (such as #15). At the top of the ticket:
- the ticket number and type (such as Takeaway);
- buttons such as Link Customer, Tags and Table to attach a customer or a table, or tag the ticket.
Under the items you will find the Subtotal, the VAT (and any service charge or discount) and the Grand Total. Major calculates the total — there is nothing to work out by hand.
Next to each item a small clock icon means "Held — not sent to kitchen yet". It changes when you send the order to the kitchen (see Send to the kitchen).
Linking what the ticket type requires
A ticket type can require entities — for example a Captain and a Table (the owner sets this in Ticket types). On such a ticket the buttons for those types come first in the row above the ticket, marked Required (1), and a red box above the items says Link before sending or paying with Still to link: and the types still missing (2).
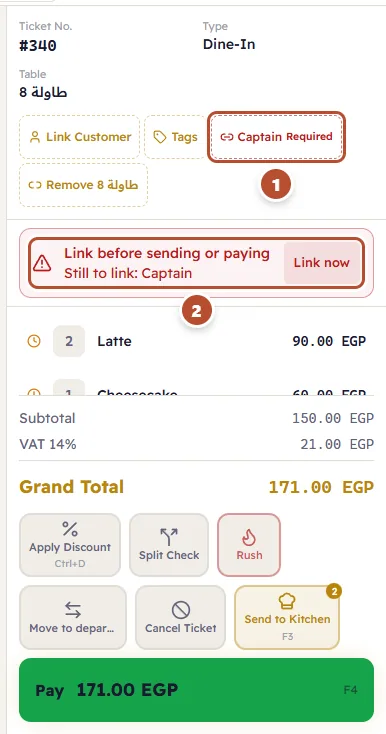
- Press Link now, or the type's own button, to choose the entity.
- If you press Pay or Send to Kitchen first, Major opens the list of that type for you instead. Choose the entity and Major goes on: the payment window opens, or the order is sent. When the type requires more than one, it asks for each in turn.
- Move to department into a department whose type requires an entity asks for it the same way, then moves the ticket.
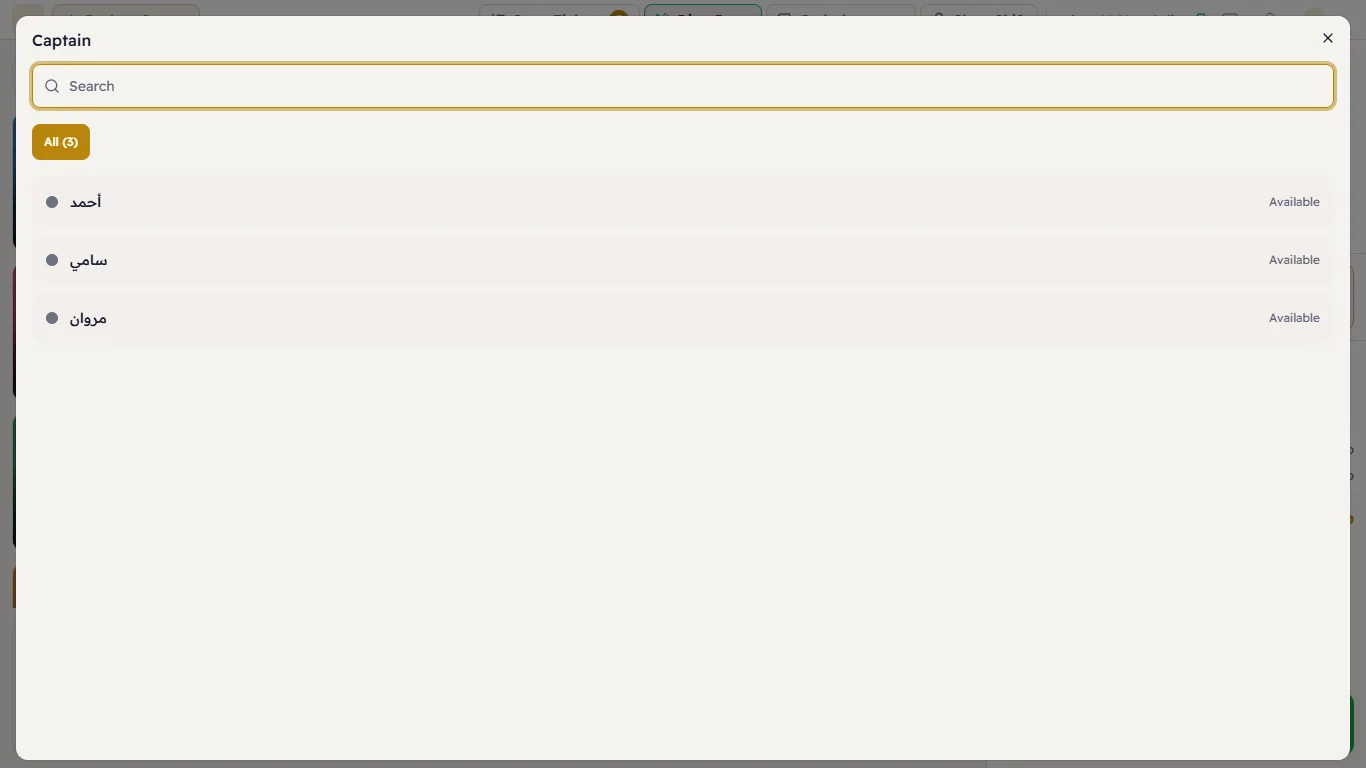
A ticket opened at a table from the floor plan already has its table, so a type that requires a table asks for nothing more (Tables). The ticket's own details (customer, address) are asked before the entities.
The ticket buttons
| Button | What it does |
|---|---|
| Apply Discount | A discount or service charge on the whole ticket (Discounts) |
| Split Check | Splits the ticket into two (Split a ticket) |
| Rush | Marks the order as urgent in the kitchen |
| Move to department | Moves the ticket to another department (Departments) |
| Cancel Ticket | Cancels the whole ticket before payment (Void and reopen) |
| Send to Kitchen | Sends the new items to the kitchen (Send to the kitchen) |
| Pay | Opens the payment window; shows the amount due (Payment) |
The buttons in the header
Next to Open Tickets and the department there is Cash drawer (cash in and out, paying and receiving from a supplier) and Close Shift. At the start of the header, if the shop has a table map, you will find Floor Plan or Back to Screen (see Tables).